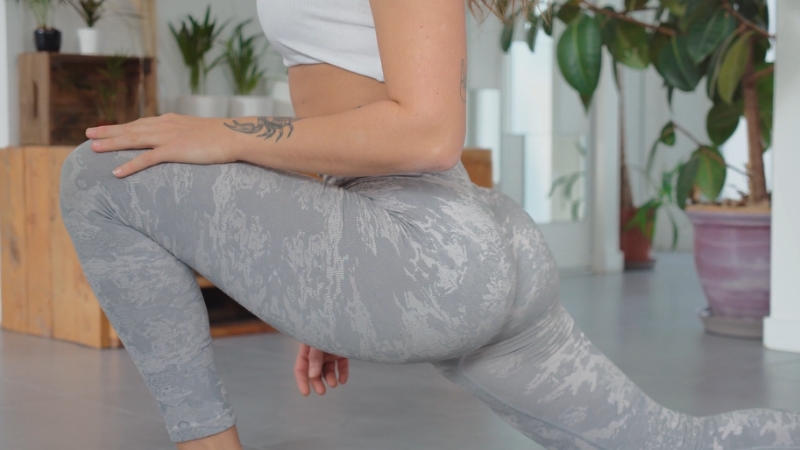
When it comes to working on your glutes, there’s a ton of advice out there—tons of exercises, tips, and way too many Instagram influencers pushing the latest trends. But let’s keep it simple. If you want a no-nonsense, effective exercise to target and grow your glutes, the Kas Glute Bridge is where you should start.
You’ve probably heard of the hip thrust, but the Kas Glute Bridge is like its underrated sibling—simpler, more controlled, and super effective for really engaging your glutes. In this article, we’ll break down what the Kas Glute Bridge is, how it’s different from the hip thrust, and how you can easily add it to your routine.
Plus, I’ll toss in some tips to help you get the most out of it. Ready to give your glutes some love?
Kas Glute Bridge vs. Hip Thrust – What’s the Difference?
You might be wondering, “If the Kas Glute Bridge is so great, why not just stick with the hip thrust?” Both exercises have their place in a well-rounded glute training program, but they serve slightly different purposes. Here’s how they compare:
1. Range of Motion
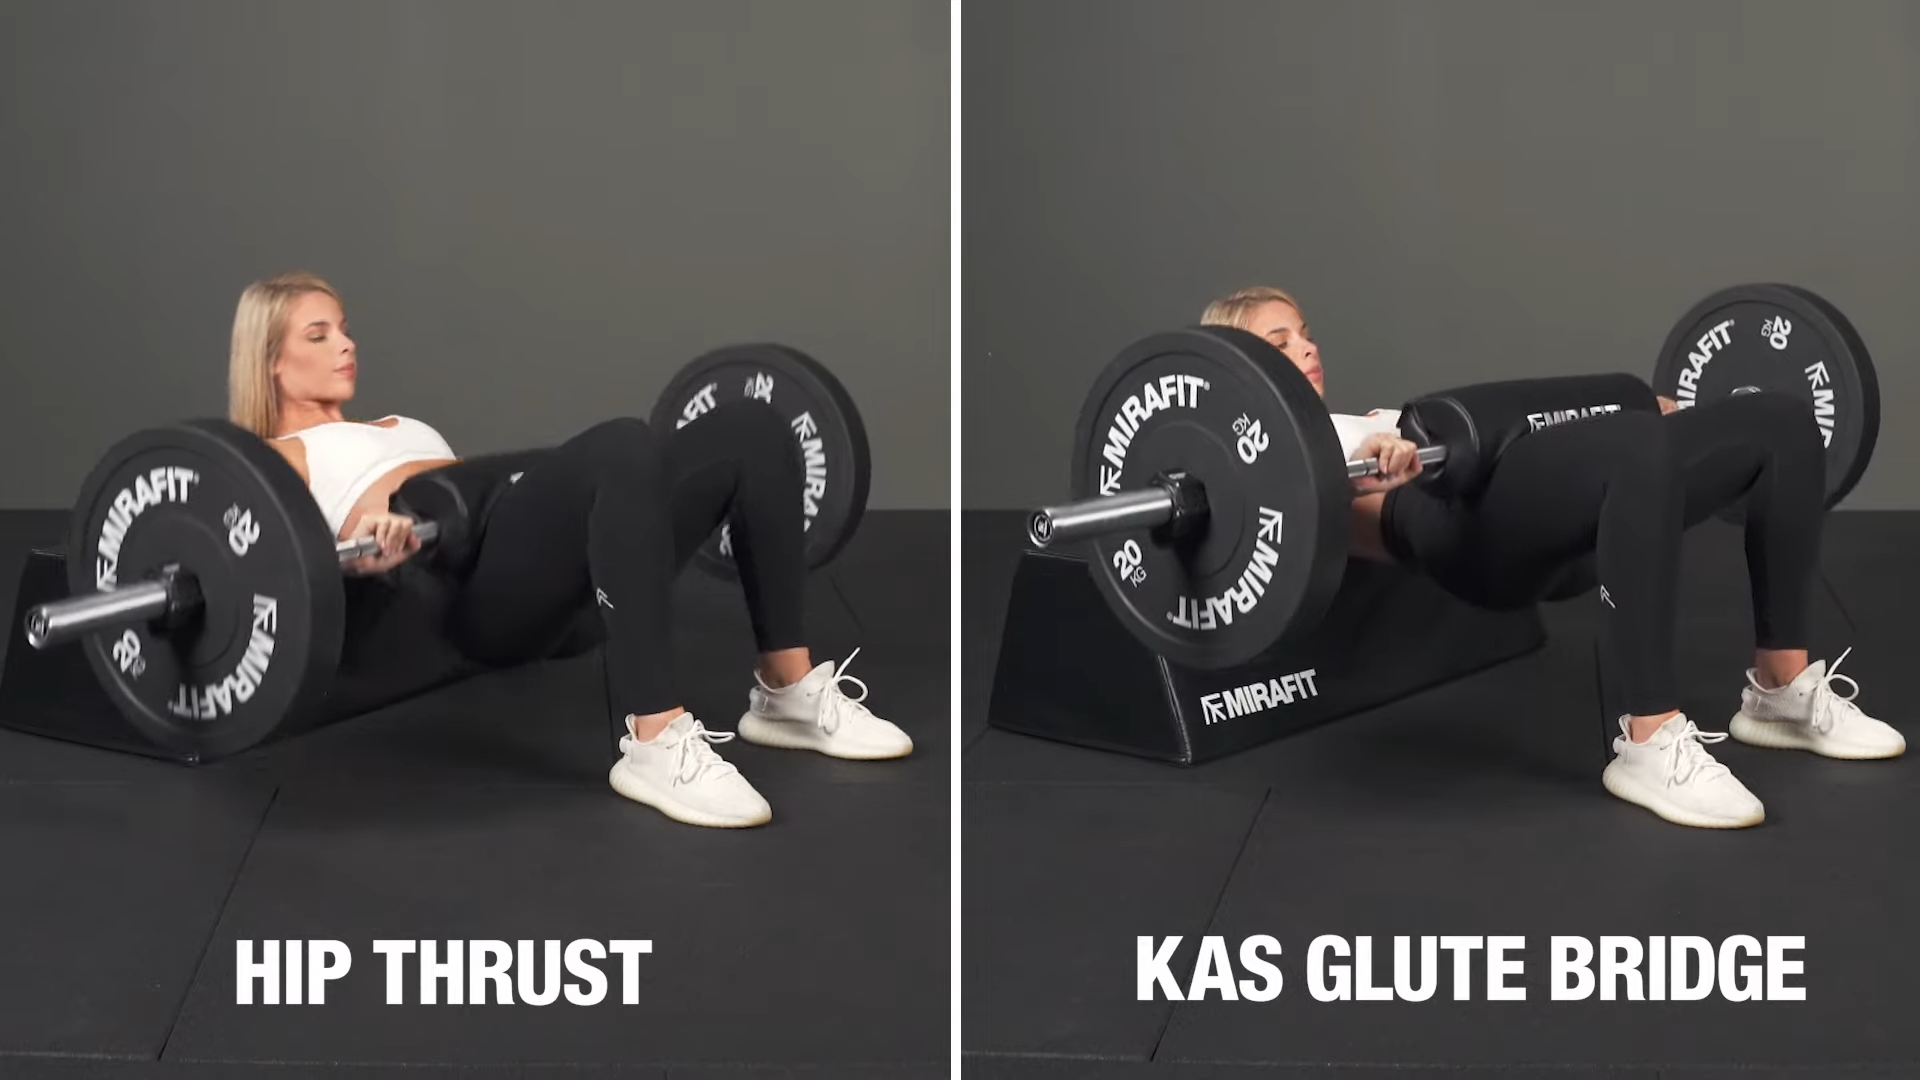
The hip thrust involves a greater range of motion. When performing a hip thrust, your hips travel from a fully flexed position (where your butt is close to the ground) to a fully extended position (where your hips are lifted as high as possible). This movement pattern allows for maximum glute activation and is ideal for building strength and power.
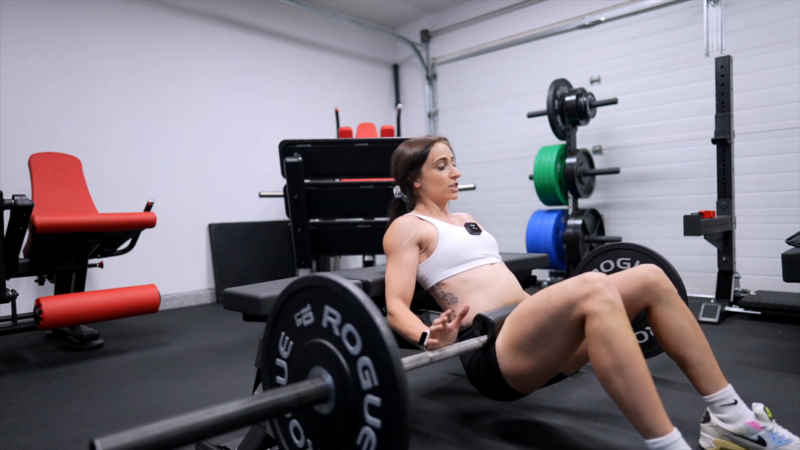
In contrast, the Kas Glute Bridge focuses on a shorter range of motion. You lift your hips, but only to the point where you can maintain constant tension on your glutes. There’s no explosive movement—just slow, controlled lifting and squeezing of the glutes.
This makes the Kas Glute Bridge more about muscle endurance and hypertrophy (muscle growth) than sheer strength.
2. Tension and Muscle Engagement
One of the main benefits of the Kas Glute Bridge is its ability to keep the glutes under constant tension. This continuous engagement means your muscles are working harder for longer, which can lead to better muscle growth over time.
On the other hand, the hip thrust allows for a brief moment of rest at the top of the movement (when your hips are fully extended). While this can be beneficial for building explosive strength, it doesn’t offer the same level of sustained muscle tension as the Kas Glute Bridge.
3. Ease of Learning
The Kas Glute Bridge is generally easier for beginners to learn and execute correctly. The smaller range of motion and the focus on controlled movement reduce the risk of using improper form, which can lead to injury.
4. Equipment Needed
Both exercises can be performed with minimal equipment, but the Kas Glute Bridge is particularly accessible. All you really need is a bench or elevated surface and a resistance band or some light weights. The hip thrust, on the other hand, often involves heavier weights like a barbell, which might not be ideal for beginners just getting started.
How to Perform the Exercise
The beauty of this exercise is in its simplicity, but like any exercise, proper form is crucial to get the most out of it and avoid injury.
Step 1 – Set Up Your Space
Find a sturdy bench or elevated surface where you can rest your upper back. You’ll also need a resistance band or a light weight (like a dumbbell or a weight plate) to add some resistance. If you’re just starting out, you can perform the exercise without any added weight.
Step 2 – Position Yourself
Sit on the ground with your back against the bench. Roll your shoulders back and position the bench so that it sits just below your shoulder blades. This will be your pivot point during the exercise. Your feet should be flat on the ground, hip-width apart, and directly under your knees when your hips are lifted.
Step 3 – Engage Your Core
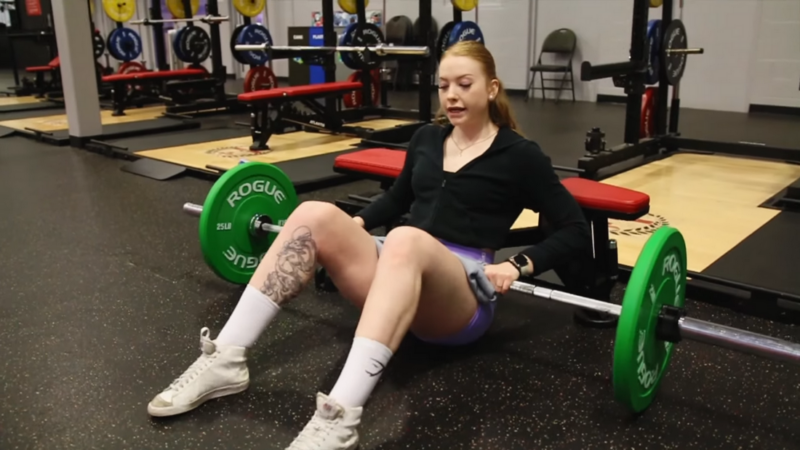
Before you begin the movement, engage your core. This will help stabilize your body and prevent your lower back from arching. Imagine bracing as if someone was about to punch you in the stomach.
Step – 4 – Lift Your Hips
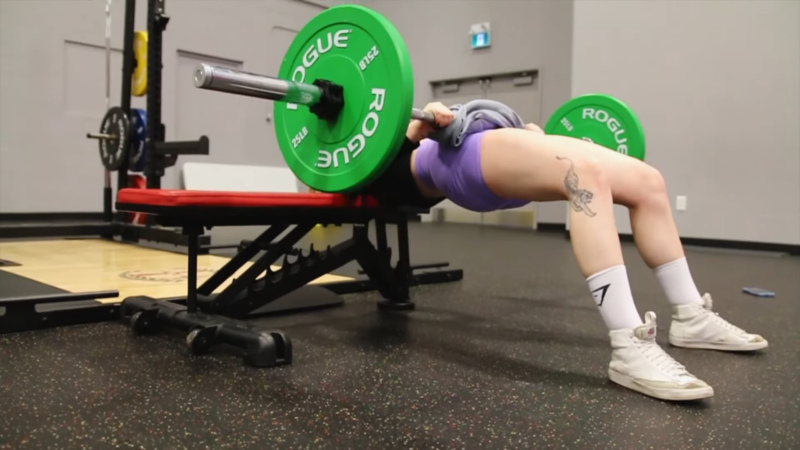
Slowly lift your hips off the ground, driving through your heels. Your goal is to raise your hips to the point where your body forms a straight line from your shoulders to your knees.
However, unlike the hip thrust, don’t worry about getting your hips as high as possible. Instead, focus on keeping your glutes engaged and squeezing them hard at the top of the movement.
Step 5 – Hold and Squeeze

Once your hips are lifted, pause for a moment and squeeze your glutes as hard as you can. This is where the magic happens. The goal is to maintain tension in your glutes throughout the entire movement.
Step 6 – Lower with Control
Slowly lower your hips back down to the starting position, but don’t let your glutes touch the ground. Keeping the tension constant is key to maximizing the effectiveness of the exercise.
Don’t rush through the reps. Slow, deliberate movements will engage your glutes more effectively than quick, jerky motions.
Start with Body weight!
If you’re new to strength training, start with just your body weight. Focus on mastering the form before adding any resistance. This will help you build a solid foundation and reduce the risk of injury.
Use a Mirror
Perform the exercise in front of a mirror to check your form. Make sure your hips are aligned with your knees and shoulders, and that your lower back isn’t arching.
Add Resistance Gradually
Once you’re comfortable with the movement, start adding resistance. A resistance band around your thighs is a great way to increase the difficulty without adding too much strain on your joints.
Focus on Mind-Muscle Connection
The mind-muscle connection is key to getting the most out of any exercise. Really focus on squeezing your glutes during the movement, and don’t be afraid to go slow. Quality reps are far more effective than rushing through the set.
The Bottom Line
The Kas Glute Bridge might not grab as much attention as other exercises, but it’s a real game-changer when it comes to results. Just keep in mind that consistency and good form are what really matter.
Start slow, focus on doing it right rather than just doing more reps, and gradually ramp up the intensity as you get stronger. Stick with it, and you’ll be well on your way to those strong, sculpted glutes you’re aiming for.